curry
Curry Quinoa
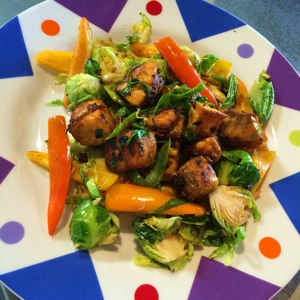
Curry Quinoa was a dish I made up out of desperation because I’d forgotten I was bringing a dish to a friend’s party! It was a good challenge and exercise in ‘what’s the thought process?’ when creating a dish. Since I don’t follow or teach using recipes in the sense most folks use them, I want to show how easy it is to make up a dish with what you have! The more you make up dishes, the easier it becomes. It’s like anything in life, practice makes perfect.
 The 4 things to focus on when creating your dish are taste, texture, color and presentation in that order.
Ingredients:
3 cups quinoa (4 cups water)
big bunch of multi-colored mini sweet peppers, chopped
3 medium size yellow squash, sliced in quarters
1/2 onion chopped
3 scallions chopped
big bunch of cilantro chopped
3 garlic gloves, diced
Seasonings:
dash of tamari
dash of sherry
curry powder to cover quinoa and veggies completely
tablespoon of organic ghee
oil for stir frying (canola, coconut oil, grapeseed oil, avocado oil)
I use a lightweight, thin walled cast iron wok and portable butane gas stove setup because I have an electric stove! Please don’t use a nonstick wok because you cannot use it above medium heat!
You can substitute with any veggies you like instead of squash and peppers but make sure you have some bright colors to make your dish POP!
Method:
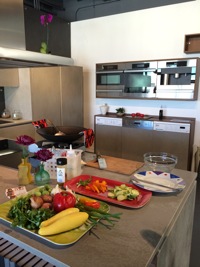
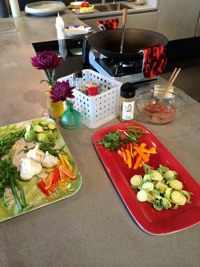
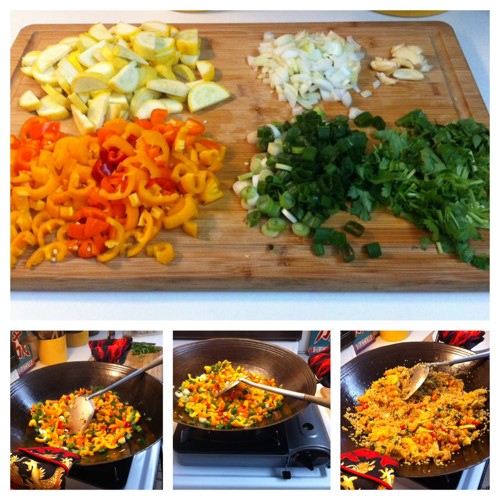
1. While quinoa is cooking, chop all the veggies on a big chopping board and leave there.
2. Fry veggies in batches so you don’t overload your wok and they become soggy.
3. My stir fry process guarantees success everytime…
– heat wok till you see first wisp of smoke
– add 3 swirls of oil around wok
– add garlic and added squash, plate it
– do same process for mini sweet peppers and onions
4. Quinoa should be cooked by this time, fluff it up, add ghee and keep fluffing!
– add quinoa and all veggies back into wok and combine well
– sprinkle enough curry powder to completely cover quinoa and veggies and combine well
– last, sprinkle scallions and cilantro and combine, give it a taste and see if you need to adjust flavors like a bit more tamari or curry powder
5. Transfer to serving bowl, admire, take photos and enjoy!
No. 1 – taste
Lately, I’ve been experimenting with ghee, a clarified butter Indians like to use when making curries etc. I added a tablespoon to the dish which gave it a very creamy texture and so tasty. So now number 1 & 2 are in place.
No. 2 – texture
Initially, I thought I’d just bring a big platter of stir fried veggies but on their own, they looked very wimpy. I found quinoa which bulked up the dish and made it more substantial plus gave it texture, there’s no.2.
No.3 – color
I found yellow squash and a big bag of multi-colored mini sweet peppers in the fridge and started panicking thinking, well, that’s not very interesting. Yes, colors are bright and lovely but it’s not enough. However, after stir frying them in my wok with just a dash of tamari and sherry and added in quinoa, the dish started coming together. I must say, a wok is a great pan to mix up large quantities of food (but please don’t stir fry large quantities in one batch because it lowers the heat of the wok and results in soggy veggies!)
It’s a good idea to have scallions and cilantro around because they add a whole new dimension to a dish. They give a nice finish and pop of freshness, color and flavor! I didn’t stir fry them, just added right at the end, so the heat from the dish gently cooks them and stayed bright green. No. 1 and 3 at work.
It still needed something else because I didn’t have many red sweet peppers so the dish looked a little beige. I spied curry powder, now we’re talking! Curry has tumeric in it and what a difference it made. I just sprinkled enough to give the quinoa and veggies color and Curry Quinoa was born. I didn’t make it spicy though because I didn’t want folks who couldn’t eat spicy not be able to try my dish. Whenever I make a quinoa dish for pot luck, all the guys tell me they‘ve never had quinoa and wouldn’t have liked it if it was ‘healthy’, ha, ha, well, not only did they like it, they finished it.
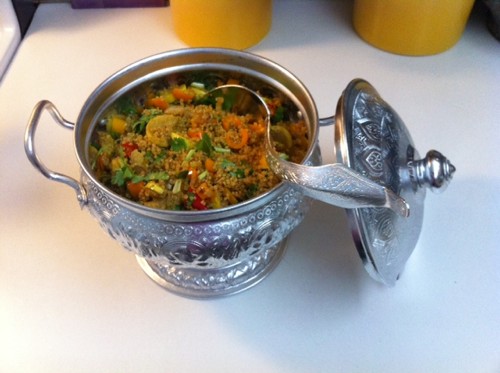
My foodie chef friend, Kyra gifted me this beautiful intricate patterned steel Thai rice bowl with serving spoon years ago. Anything you put in this serving bowl makes a wonderful presentation. It’s so unique and stands out, doesn’t take up much space and so elegant. If you’re going to make a contribution to a pot luck, make it memorable!
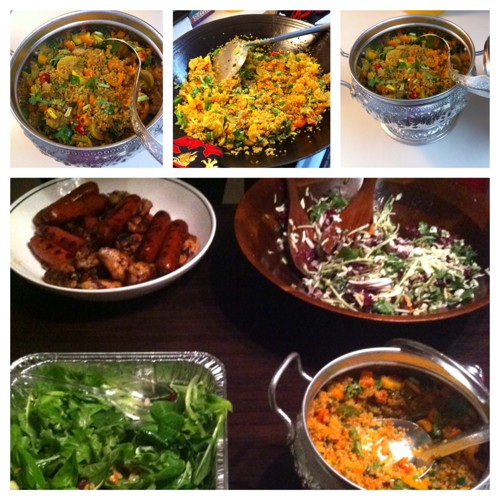 The dish was a big hit and when I wanted to take the bowl home, Michelle wanted me to leave her the last bit! I was so tickled she liked it.
To all the Wok Stars out there, just keep practicing and you’ll be rewarded with loads of compliments. I’d love to hear your ‘thought process’ when you put a dish together!
Shelley-Belly's Wok Beef Rendang (Updated)
Shelley-Belly is a foodie chef and a Wok Star! She made an amazing Indonesian Beef Rendang in her cast iron wok and agreed to share it with us, yay!
I love this chalkboard where Shelley laid out her ingredients & marked them!
Shelley-Belly presents extraordinary “underground supper clubs” in Miami and I’ve been lucky enough to attend two! Her claim to fame among many other things is her outstanding pork belly with the crispiest skin I’ve EVER had, still dreaming and drooling, I posted about my underground dinner experience here. I couldn’t resist mentioning the piggy, oops.
Follow her on twitter for upcoming dates and check out her blog to get on her list for future dinner dates and tell her Wok Star sent you! You’ll enjoy it tremendously, it’s how my hubby and I like to dine.
Someone saw her Beef Rendang on Facebook and wanted her recipe, I hope this will be a first in a series of Wok Star guest posts. If you have my Wok Star Kit, I would love for you to share your creation with us, it doesn’t have to be complicated, just your personal spin!
Take it away, Shelley-Belly…
I do a lot of Asian cooking but don’t generally blog about it because… well I’m not Asian and I’m far from an expert but this one of those dishes that, with a bit of patience, I think most people can get right, or pretty close to right. Rendang is, arguably, the most well known dish to come out of Indonesia… I don’t know that I do it justice, but I do it. If you’ve got all day, do it with beef, if you’ve got a few hours do it with chicken. Ideally though, do it a day or two before you plan on eating it, it improves with age.
There are hundreds of variations and combinations of ingredients for this dish. I’ve seen recipes that include fish sauce, star anise, fennel seeds, coriander seeds, cumin, tamarind (usually found in chicken rendang), nutmeg and a host of other ingredients and it’s probably okay to include any and all of these in your rendang if you choose. I think rendang is about depth of flavour – preparing each ingredient with care and layering the flavors to make a really deep, punchy dish. And, much like a Bourguignon, a Bolognese or a good Irish stew, every household probably has a similar variation on a theme, a “secret” recipe handed down through generations that they will tell you is the best ever. Whatever ingredients you choose to use in your rendang, just make sure they’re good quality and that they’re flavors that you love.
This is my version of a beef rendang or rendang daging. It’s a pretty basic recipe, feel free to change it up but make sure to always include – coconut milk, dried coconut, ginger, turmeric, lemon grass, garlic, shallots, birds’ eye chillies.
Serves four
Time – a little over four hours including prep and cooking.
Best prepared a day or two ahead
Ingredients:
2 lbs beef shin (This weight included four marrow bones. I like shin and neck for this dish but any good stewing cut will do.) Cut into 1 inch cubes. Reserve the bones.
400 ml coconut milk
500 ml to 600 ml water
1 cup dried coconut (toasted in a dry pan or wok until golden)
1 cinnamon stick
4-6 cardamom pods
4-6 kaffir lime leaves (some recipes say to shred these, I prefer to leave them whole and remove them just before serving)
1 tbl spoon (more or less) palm sugar (use brown sugar if you don’t have palm sugar)
1 tea spoon salt (more or less)
4 tbl spoons cooking oil (veg, peanut, whatever you happen to have. I used 2 tbl spoons of canola oil and 2 tbl spoons of coconut oil – don’t use coconut oil on its own as it doesn’t have a high enough smoking point to cook out the spice paste).
For the curry paste
8-10 shallots, skins removed
5 cloves garlic, skins removed
2 thumb sized pieces of ginger, roughly chopped
OR
1 thumb sized piece of ginger and 1 of galangal (I could not find galangal when I prepared this)
8-10 dried chillies, soaked and seeds removed (more or less according to your spice threshold although this is typically a very spicy dish)
8-10 fresh birds’ eye chillies (if you can’t get fresh use a few extra dried chillies)
1 thumb sized piece of turmeric, peeled and roughly chopped
4 stalks lemon grass, roughly 4 inches long, outer skin removed
3 candlenuts (if you can’t get candle nuts use macadamia. I have heard of people using cashews too but I find cashew flavor is too distinctive)
If you’re feeling energetic, now’s the time to break out your pestle and mortar and get bashing. If you’re not, just pop all the ingredients for the curry paste into a blender and blend into a fine paste. Using a pestle and mortar and taking the time to bash each ingredient on its own will give you a finer result but it is a labor of love.
For the curry
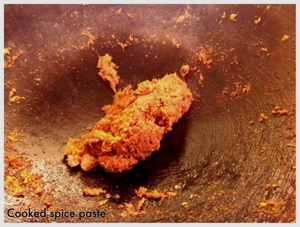
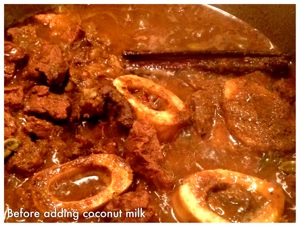
Heat your wok, add the cooking oil and bring it up to a high temp. Add the curry paste and reduce to a medium heat. Cook, stirring frequently, for about 10 minutes. Be careful not to let it burn or stick. When the curry paste has cooked through, turn up the heat and add the beef to the wok. Stir to thoroughly coat in the paste, cook for a minute or two, and add the reserved marrow bones if you have them. Add the cinnamon, cardamom, kaffir lime, salt and sugar. Add the water, enough to cover the meat but don’t drown it. Reduce the heat and simmer, stirring gently and frequently, until the liquid has reduced by half. This should take more than an hour. Add the coconut milk and continue stirring and simmering for another two hours. The key with this dish is to allow the flavors to be absorbed slowly into the meat and for the meat to cook to where it is meltingly tender – if you feel the liquid is evaporating too quickly pop an angled lid onto the wok. During this two hour cooking period be sure to taste and make sure the seasoning is balanced – now is the time to add more sugar or salt if you think it needs it.
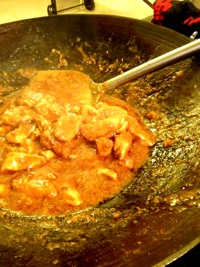
After a total cooking time of just over three hours the liquid should be all but reduced and the meat just about falling apart. Add the toasted coconut, stir gently to coat (the meat should be almost falling apart by now) and cook for another 15 to 20 minutes. I have seen recipes in which the toasted coconut is added at the same time as the coconut milk – I’m sure it’s fine to do it that way, I don’t because I love the texture of the coconut and don’t want it cooked out.
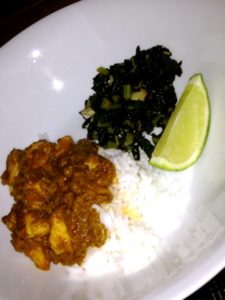
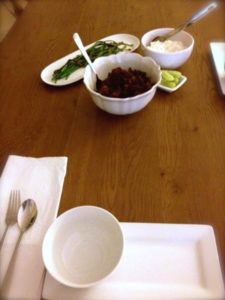
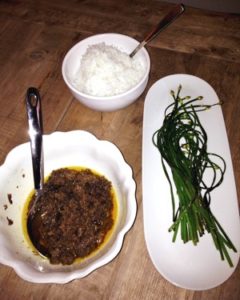
We garnished the rendang with fresh cilantro and a wedge of lime and served it with steamed rice and stir fried Chinese chives.”
I know there are foodies who will want to make this at home but if you’re like me and balked at the process (I’m just too lazy) with making this Beef Rendang, head out to Indomania, a cozy Indonesian restaurant where they serve it (sorry Shelley).
